[TOC]
一、主节点、副节点、分片与复制分片关系
1、master主节点
集群中用于元数据(metadata)的请求处理,比如确定分片位置,索引的新增、删除请求分配等
2、node节点
包括client node和 data node
client nodenode.master=flase,node.data=false 用于转发请求,起到平衡负载的作用data nodenode.master=flase,node.data=true 节点上保存了数据分片。它负责数据相关操作,比如分片的 CRUD,以及搜索和整合操作。这些操作都比较消耗 CPU、内存和 I/O 资源
3、shards分片
在设置索引时默认(5)或自己设置的分片数量,即indices(1)–shards(n),而每插入一条数据都会在唯一主分片中,即Document(n)–shards(1)
4、replicas复制分片
同样在设置索引时会默认(1)或自定义复制分片数量,该数量对应关系为每个主分片对应的复制分片,即shards(1)–replicas(n)
5、es的端口
9300端口是使用tcp客户端连接使用的端口; 9200端口是通过http协议连接es使用的端口;
二、集群搭建
1、准备工作
一、修改主机名及hosts
二、创建es用户及相关目录
Elasticsearch不允许root用户运行,创建一个新用户来启动Elasticsearch。
useradd  es
mkdir -p /data/elasticsearch/data
mkdir -p /data/logs/elasticsearch
mkdir -p /data{1..12}/elasticsearch
chown -R es.es /data{1..12}/elasticsearch
chown -R es.es /data/elasticsearch/data
chown -R es.es /data/logs/elasticsearch
chown -R es.es /usr/local/elasticsearch-6.4.0
三、优化文件句柄数可用进程数
新版 Elasticsearch 要求其可用的文件句柄至少为 65536,同時要求其进程数限制至少为 2048,对应下面两个报错信息
- max file descriptors [4096] for elasticsearch process is too low, increase to at least [65536];
- max number of threads [1024] for user [es] is too low, increase to at least [2048]。
vim /etc/security/limits.conf

* soft nofile 655360
* hard nofile 655360
* soft nproc  655360
* hard nproc  655360
* soft memlock unlimited
* hard memlock unlimited
四、修改内核交换
为了避免不必要的磁盘和內存交换,影响效率,需要将 vm.swappiness 修改为 1。
此外需要修改最大虚拟內存 vm.max_map_count 防止启动时报错:max virtual memory areas vm.max_map_count [65530] likely too low, increase to at least [262144]。
vim /etc/sysctl.conf
#添加
vm.swappiness = 1
vm.max_map_count = 655360

sysctl -p   # 立即生效
五、关闭swap
swapoff -a
六、es内存配置
官方建议的heap size不要超过系统可用内存的一半。
Heap分配多少合适?遵从官方建议就没错。 不要超过系统可用内存的一半,并且不要超过32GB。JVM参数呢?对于初级用户来说,并不需要做特别调整,仍然遵从官方的建议,将xms和xmx设置成和heap一样大小,避免动态分配heap size就好了。
2、安装配置集群
一、配置java环境
yum install jdk-1.8* -y
source /etc/profile.d/jdk.sh
二、安装elasticsearch
源码安装,下载地址
# 此包为破解好的包
cd /data/soft/packs && wget http://10.21.8.20/elasticsearch/elasticsearch-6.4.0-x-pack.tar.gz
tar zxvf elasticsearch-6.4.0-x-pack.tar.gz -C /usr/local
三、 配置Elasticsearch
主配置文件elasticsearch.yml
cluster.name: k8s-es
node.name:  es-11-14
node.master: false
node.data: true
path.data: /data1/elasticsearch/data,/data2/elasticsearch/data,/data3/elasticsearch/data,/data4/elasticsearch/data,/data5/elasticsearch/data,/data6/elasticsearch/data,/data7/elasticsearch/data,/data8/elasticsearch/data,/data9/elasticsearch/data,/data10/elasticsearch/data,/data11/elasticsearch/data,/data12/elasticsearch/data
path.logs: /data/logs/elasticsearch
bootstrap.memory_lock: true
network.host: 10.90.11.14
transport.tcp.port: 9300
transport.tcp.compress: true
http.port: 9200
http.max_content_length: 100mb
http.enabled: true
thread_pool.bulk.queue_size: 2000
thread_pool.index.queue_size: 1000

#cluster.routing.allocation.node_initial_primaries_recoveries: 4
#cluster.routing.allocation.node_concurrent_recoveries: 2
#indices.recovery.max_bytes_per_sec: 100mb
discovery.zen.minimum_master_nodes: 2
discovery.zen.ping_timeout: 5s
#discovery.zen.ping.multicast.enabled: true
discovery.zen.ping.unicast.hosts: ["10.90.2.240", "10.90.2.241","10.90.2.242"]

xpack.security.enabled: true
xpack.monitoring.collection.enabled: true
xpack.security.transport.ssl.enabled: true
xpack.ssl.key: certs/${node.name}/${node.name}.key
xpack.ssl.certificate: certs/${node.name}/${node.name}.crt
xpack.ssl.certificate_authorities: certs/ca/ca.crt
配置 jvm 最大堆和最小堆,一般为服务器物理內存的一半。
vim jvm.options

-Xms16g
-Xmx16g
四、配置文件详解
cluster.name
集群名,自定义集群名,默认为elasticsearch,建议修改,因为低版本多播模式下同一网段下相同集群名会自动加入同一集群,如生产环境这样易造成数据运维紊乱。
node.name
节点名,同一集群下要求每个节点的节点名不一致,起到区分节点和辨认节点作用
node.master
是否为主节点,选项为true或false,当为true时在集群启动时该节点为主节点,在宕机或任务挂掉之后会选举新的主节点,恢复后该节点依然为主节点
node.data
是否处理数据,选项为true或false。负责数据的相关操作
path.data
默认数据路径,可用逗号分隔多个路径
path.logs
默认日志路径
bootstrap.mlockall
内存锁,选项为true或false,用来确保用户在es-jvm中设置的ES_HEAP_SIZE参数内存可以使用一半以上而又不溢出
network.host
对外暴露的host,0.0.0.0时暴露给外网
http.port
对外访问的端口号,默认为9200,所以外界访问该节点一般为http://ip:9200/
transport.tcp.port
集群间通信的端口号,默认为9300
discovery.zen.ping.unicast.hosts
单播列表
当一个节点联系到单播列表中的成员时,它就会得到整个集群所有节点的状态,然后它会联系 master 节点,并加入集群。这意味着你的单播列表不需要包含你的集群中的所有节点, 它只是需要足够的节点,当一个新节点联系上其中一个并且说上话就可以了。如果你使用 master 候选节点作为单播列表,你只要列出三个就可以了。
集群的ip集合,可指定端口,默认为9300,如 [“192.168.1.101”,”192.168.1.102”]
discovery.zen.minimum_master_nodes
最少的主节点个数,为了防止脑裂,最好设置为(总结点数/2 + 1)个
discovery.zen.ping_timeout
主节点选举超时时间设置
gateway.recover_after_nodes
值为n,网关控制在n个节点启动之后才恢复整个集群
node.max_local_storage_nodes
值为n,一个系统中最多启用节点个数为n
action.destructive_requires_name
选项为true或false,删除indices是否需要现实名字
五、x-pack
x-pack是elasticsearch的一个扩展包,将安全,警告,监视,图形和报告功能捆绑在一个易于安装的软件包中,虽然x-pack被设计为一个无缝的工作,但是你可以轻松的启用或者关闭一些功能。 ES的密码管理是用x-pack来实现的。
获取免费x-pack
获取免费的lisence 一个月
#Get License API
curl -XGET 'http://10.21.8.61:9200/_xpack/license'

#查看状态
curl -XGET 'http://10.21.8.61:9200/_xpack/license/trial_status'

#start
curl -XPOST 'http://10.21.8.61:9200/_xpack/license/start_trial'
curl -XPOST 'http://10.21.8.61:9200/_xpack/license/start_trial?acknowledge=true'
修改elasticsearch.yml 增加
xpack.security.enabled: true
设置密码
./bin/elasticsearch-setup-passwords interactive
检查密码:
$ curl -u elastic 'http://10.21.8.61:9200/_xpack/security/_authenticate?pretty'
修改默认账户信息 Elasticsearch 的默认账户为 elastic 默认密码为 changme
curl -XPUT -u elastic 'http://localhost:9200/_xpack/security/user/elastic/_password' -d '{ "password" : "yourpasswd" }'
curl -XPUT -u elastic 'http://localhost:9200/_xpack/security/user/kibana/_password' -d '{ "password" : "yourpasswd" }
破解x-pack(7.x的不需要破解了)
破解顺序:
- 安装elk,关闭x-pack启动
- 重新打x-pack包,修改license
- 修改license后成为白金用户后在修改密码
- 开启x-pack
重要提示 : xpack.security.enabled只有在破解之后,并且配置好ssl,才能为true,当设置了密码就可以登录
修改license
准备LicenseVerifier.java 和XPackBuild.java两个文件后进行替换
- LicenseVerifier.java如下:
package org.elasticsearch.license;
import java.nio.*; import java.util.*;
import java.security.*;
import org.elasticsearch.common.xcontent.*;
import org.apache.lucene.util.*;
import org.elasticsearch.common.io.*;
import java.io.*;

public class LicenseVerifier {
    public static boolean verifyLicense(final License license, final byte[] encryptedPublicKeyData) {
        return true;
    }

    public static boolean verifyLicense(final License license)     {
        return true;
    }
}
- XPackBuild.java如下:
package org.elasticsearch.xpack.core;
import org.elasticsearch.common.io.*;
 import java.net.*;
 import org.elasticsearch.common.*;
 import java.nio.file.*;
 import java.io.*;
 import java.util.jar.*;
 public class XPackBuild {
    public static final XPackBuild CURRENT;
    private String shortHash;
    private String date;
    @SuppressForbidden(reason = "looks up path of xpack.jar directly") static Path getElasticsearchCodebase() {
        final URL url = XPackBuild.class.getProtectionDomain().getCodeSource().getLocation();
        try { return PathUtils.get(url.toURI()); }
        catch (URISyntaxException bogus) {
            throw new RuntimeException(bogus); }
        }

    XPackBuild(final String shortHash, final String date) {
            this.shortHash = shortHash;
            this.date = date;
            }

    public String shortHash() {
        return this.shortHash;
        }
    public String date(){
        return this.date;
        }

    static {
        final Path path = getElasticsearchCodebase();
        String shortHash = null;
        String date = null;
        Label_0157: { shortHash = "Unknown"; date = "Unknown";
    }

    CURRENT = new XPackBuild(shortHash, date);
    }
}
打包成class
- LicenseVerifier
javac -cp "/usr/local//elasticsearch-6.4.0/lib/elasticsearch-6.4.0.jar:/usr/local/elasticsearch-6.4.0/lib/lucene-core-7.4.0.jar:/usr/local/elasticsearch-6.4.0/modules/x-pack-core/x-pack-core-6.4.0.jar" LicenseVerifier.java
- XPackBuild
javac -cp "/usr/local/elasticsearch-6.4.0/lib/elasticsearch-6.4.0.jar:/usr/local/elasticsearch-6.4.0/lib/lucene-core-7.4.0.jar:/usr/local/elasticsearch-6.4.0/modules/x-pack-core/x-pack-core-6.4.0.jar:/usr/local/elasticsearch-6.4.0/lib/elasticsearch-core-6.4.0.jar" XPackBuild.java
替换
而后在将x-pack-core/x-pack-core-6.4.0.jar拿到本地解压 复制到本地
cp -a /usr/local/elasticsearch-6.4.0/modules/x-pack-core/x-pack-core-6.4.0.jar .
此时目录下有五个文件
$ ll
-rw-rw-r-- 1 es es     410 Sep  7 10:00 LicenseVerifier.class
-rw-rw-r-- 1 es es     508 Sep  7 09:54 LicenseVerifier.java
-rw-rw-r-- 1 es es    1508 Sep  7 10:00 XPackBuild.class
-rw-rw-r-- 1 es es    1274 Sep  7 09:55 XPackBuild.java
-rw-r--r-- 1 es es 1796132 Sep  7 10:00 x-pack-core-6.4.0.jar
为了能够分辨的更清楚,创建一个目录jardir,复制进去后解压,而后删除原来的包或者备份
# mkdir jardir
# cp x-pack-core-6.4.0.jar jardir/
# cd jardir/
# jar -xf x-pack-core-6.4.0.jar
# rm -rf x-pack-core-6.4.0.jar
将class覆盖进去
# cp -a LicenseVerifier.class jardir/org/elasticsearch/license/
cp:是否覆盖"jardir/org/elasticsearch/license/LicenseVerifier.class"? yes

# cp -a XPackBuild.class jardir/org/elasticsearch/xpack/core/
cp:是否覆盖"jardir/org/elasticsearch/xpack/core/XPackBuild.class"? yes
当文件覆盖到jardir中的org/elasticsearch/xpack/core和org/elasticsearch/license中后,开始打包
# cd jardir/
# jar -cvf x-pack-core-6.4.0.jar *
生成一个新的x-pack-core-6.4.0.jar包后覆盖到/usr/local/elasticsearch-6.4.0/modulesx-pack-core/下,license修改完成,而后重启
申请License
打开elastic申请页面进行申请,会发送到邮箱,下载后进行编辑
将 "expiry_date_in_millis":1565135999999修改"expiry_date_in_millis":2565135999999
将"type":"basic"修改为"type":"platinum"
修改后的json文件:
{"license":{"uid":"71f0c7aa-2273-4ff3-bbaa-f37f444c338d","type":"platinum","issue_date_in_millis":1536192000000,"expiry_date_in_millis":2565135999999,"max_nodes":100,"issued_to":"an feng (test)","issuer":"Web Form","signature":"AAAAAwAAAA0kF2rgHEEteOie60gIAAABmC9ZN0hjZDBGYnVyRXpCOW5Bb3FjZDAxOWpSbTVoMVZwUzRxVk1PSmkxaktJRVl5MUYvUWh3bHZVUTllbXNPbzBUemtnbWpBbmlWRmRZb25KNFlBR2x0TXc2K2p1Y1VtMG1UQU9TRGZVSGRwaEJGUjE3bXd3LzRqZ05iLzRteWFNekdxRGpIYlFwYkJiNUs0U1hTVlJKNVlXekMrSlVUdFIvV0FNeWdOYnlESDc3MWhlY3hSQmdKSjJ2ZTcvYlBFOHhPQlV3ZHdDQ0tHcG5uOElCaDJ4K1hob29xSG85N0kvTWV3THhlQk9NL01VMFRjNDZpZEVXeUtUMXIyMlIveFpJUkk2WUdveEZaME9XWitGUi9WNTZVQW1FMG1DenhZU0ZmeXlZakVEMjZFT2NvOWxpZGlqVmlHNC8rWVVUYzMwRGVySHpIdURzKzFiRDl4TmM1TUp2VTBOUlJZUlAyV0ZVL2kvVk10L0NsbXNFYVZwT3NSU082dFNNa2prQ0ZsclZ4NTltbU1CVE5lR09Bck93V2J1Y3c9PQAAAQAGtPyufVDX2OiUaL7F6zZQQOaJObBP+LqVz8YIuW0z3HwyrJB4esfgmsgo3Pd3cFYd73gLmLHb8ozugq4UJmntrwey/iC6mT+to7dwKe8h5+K7EG0Un/9Dn2HacdFdo4YI4kC0ixVGKFXm/GKOkv4PfJ+MVU7UzXduRIaoDlrKegzvwh/8moh9SirO8JrC3x3y9ulCtRmOCeGmTtBFgBbAGU4q6gkRDGPHYGYrbPr0Qji4a7nAZYcNmFXUq/TSj0NlVvVWWg7h1cP7Ks24xYcC933Ud0Cjj3FsA9MANcH/tZzUG4FFqlnvN7YIpBLPHaojqzdsWY252han3gXO9fqd","start_date_in_millis":1536192000000}}
在kibana中配置
来到 Management 选择 License Management,点击update license上传以及修改好的License
配置SSL/TLS
运行Elasticsearch目录下的certgen:
$ bin/x-pack/certgen
This tool assists you in the generation of X.509 certificates and certificate
signing requests for use with SSL in the Elastic stack. Depending on the command
line option specified, you may be prompted for the following:

* The path to the output file
    * The output file is a zip file containing the signed certificates and
      private keys for each instance. If a Certificate Authority was generated,
      the certificate and private key will also be included in the output file.
* Information about each instance
    * An instance is any piece of the Elastic Stack


    that requires a SSL certificate.
      Depending on your configuration, Elasticsearch, Logstash, Kibana, and Beats
      may all require a certificate and private key.
    * The minimum required value for each instance is a name. This can simply be the
      hostname, which will be used as the Common Name of the certificate. A full
      distinguished name may also be used.
    * A filename value may be required for each instance. This is necessary when the
      name would result in an invalid file or directory name. The name provided here
      is used as the directory name (within the zip) and the prefix for the key and
      certificate files. The filename is required if you are prompted and the name
      is not displayed in the prompt.
    * IP addresses and DNS names are optional. Multiple values can be specified as a
      comma separated string. If no IP addresses or DNS names are provided, you may
      disable hostname verification in your SSL configuration.
* Certificate Authority private key password
    * The password may be left empty if desired.

Let's get started...

Please enter the desired output file [certificate-bundle.zip]:
Enter instance name: node-1  (这里就设置ES节点名称)
Enter name for directories and files [node-1]:
Enter IP Addresses for instance (comma-separated if more than one) []: 10.1.129.101  (这里就设置ES节点IP)
Enter DNS names for instance (comma-separated if more than one) []: 10.1.129.9         (这里就设置ES节点DNS)
Would you like to specify another instance? Press 'y' to continue entering instance information: n     (设置多个ES节点,可以选择Y来继续设置)
Certificates written to /usr/local/elasticsearch-6.1.0/bin/x-pack/certificate-bundle.zip   (设置完成会生成certificate-bundle.zip文件)

This file should be properly secured as it contains the private keys for all
instances and the certificate authority.

After unzipping the file, there will be a directory for each instance containing
the certificate and private key. Copy the certificate, key, and CA certificate
to the configuration directory of the Elastic product that they will be used for
and follow the SSL configuration instructions in the product guide.

For client applications, you may only need to copy the CA certificate and
configure the client to trust this certificate.
配置SSL/TLS
在elasticsearch-6.4.0/config中创建一个certs目录,并将上述生成的certificate-bundle.zip解压后,将所有文件夹和文件拷贝到certs目录中 将如下的信息添加下elasticsearch.yml配置文件中,如果有多个节点,则全部都要添加:
xpack.ssl.key: certs/${node.name}/${node.name}.key
xpack.ssl.certificate: certs/${node.name}/${node.name}.crt
xpack.ssl.certificate_authorities: certs/ca/ca.crt
xpack.security.transport.ssl.enabled: true
六、添加新节点
给新节点生成证书 –cert –key 指定现有证书
$ /usr/local/elasticsearch-6.4.0/bin/elasticsearch-certgen --cert /home/es/1/ca/ca.crt --key /home/es/1/ca/ca.key

Please enter the desired output file [certificate-bundle.zip]:
Enter instance name: es-8-106
Enter name for directories and files [es-8-106]:
Enter IP Addresses for instance (comma-separated if more than one) []: 10.21.8.106
Enter DNS names for instance (comma-separated if more than one) []:
Would you like to specify another instance? Press 'y' to continue entering instance information: n
Certificates written to /home/es/4/certificate-bundle.zip

This file should be properly secured as it contains the private keys for all
instances and the certificate authority.

After unzipping the file, there will be a directory for each instance containing
the certificate and private key. Copy the certificate, key, and CA certificate
to the configuration directory of the Elastic product that they will be used for
and follow the SSL configuration instructions in the product guide.

For client applications, you may only need to copy the CA certificate and
configure the client to trust this certificate.
###初始化
wget http://10.21.8.20/init/centos-disk-init.sh
wget http://10.21.8.20/init/puppetclient
sh puppetclient  k8s-es-
sh centos-disk-init.sh
#### 安装软件
cd /data/soft/packs && wget http://10.21.8.20/elasticsearch/elasticsearch-6.4.0-x-pack.tar.gz
tar zxvf elasticsearch-6.4.0-x-pack.tar.gz -C /usr/local

useradd es
mkdir -p /data/elasticsearch/data
mkdir -p /data/logs/elasticsearch
mkdir -p /data{1..12}/elasticsearch
chown -R es.es /data{1..12}/elasticsearch
chown -R es.es /data/elasticsearch/data
chown -R es.es /data/logs/elasticsearch
chown -R es.es /usr/local/elasticsearch-6.4.0
3、集群可视化插件安装
下面推荐的前两个插件是 Chrome 插件,便于访问 ES,最后一个 ElasticHD 是 go 語言编写的客户端,一樣比較好用。
Head插件安装
 cd ${elasticsearch_HOME}
./plugin install mobz/elasticsearch-head
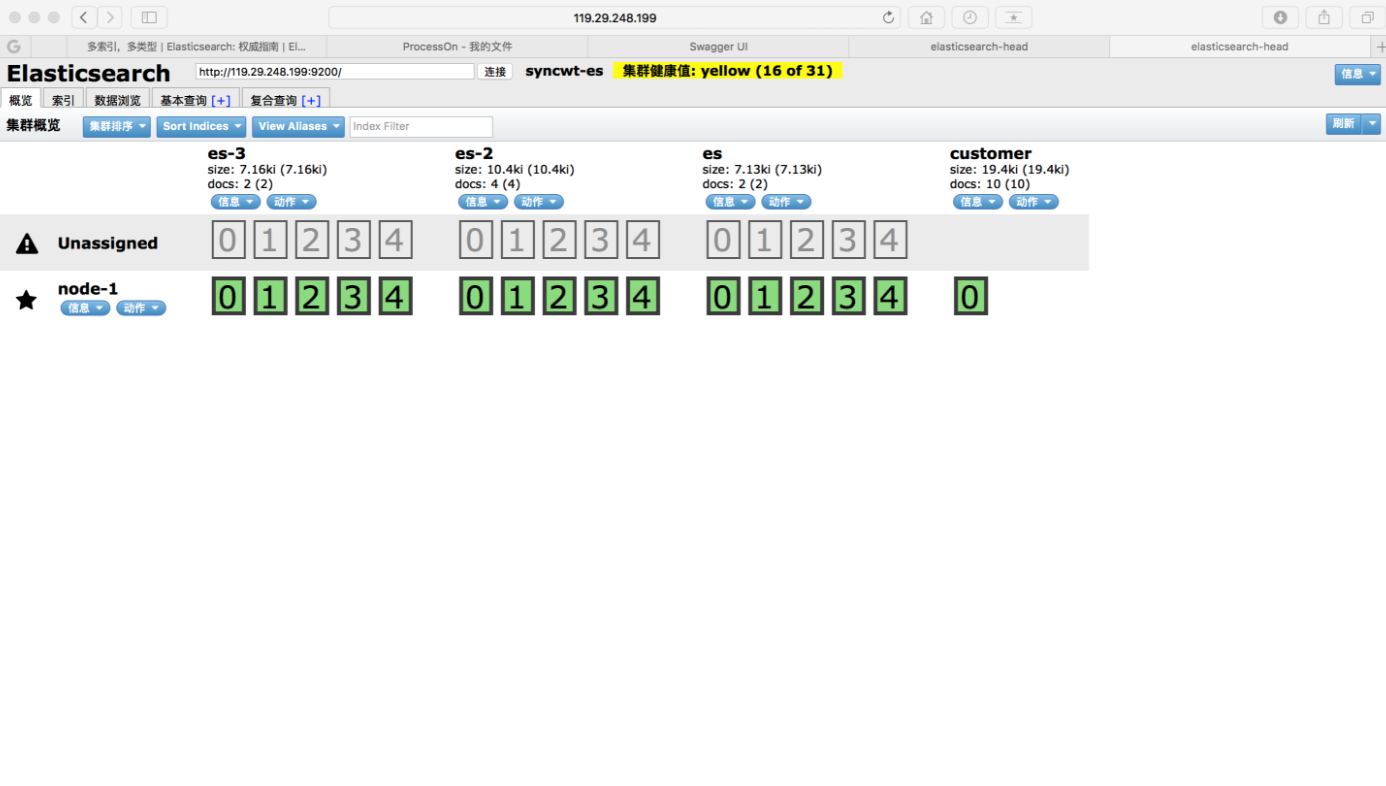
页面访问效果(单节点):
http://IP:9200/_plugin/head/
三、常用操作
es删除索引脚本
#!/bin/bash

Indexs=`curl -XGET -u user:password 'http://es.cloud.com:9200/_cat/indices' | awk '{print $3}' | egrep -v "^\."`
up_to_time=`date +%Y%m%d -d '10 days ago'`

for index in $Indexs;
do
echo $index | egrep "[0-9]{4}\.[0-9]{2}\.[0-9]{2}"
if [ $? == 0 ]
then
  time=`echo $index | egrep -o "[0-9]{4}\.[0-9]{2}\.[0-9]{2}"| awk -F'.' '{print $1$2$3}'`
if [[ $up_to_time -gt $time ]]
then
curl -XDELETE -u user:password "http://es.cloud.com:9200/${index}"
fi
fi
done
es常用命令
查看node信息
curl -XGET 'http://10.80.87.142:9200/_cat/nodes?pretty'
查看集群中的master
curl -XGET 'http://10.80.130.161:9200/_cat/master?v'
创建索引
curl -XPUT 'localhost:9200/customer?pretty&pretty'
查看索引列表
http://es.cloud.com:9200/_cat/indices?v
查看节点信息
http://10.80.130.161:9200/_nodes/stats/thread_pool?pretty
查看es线程情况
GET _nodes/stats/thread_pool?pretty
事先创建index
curl -XPUT -u lisai:xxxxxxx 'http://es.cloud.com:9200/layer7-2059.11.30?pretty&pretty' -H 'Content-Type: application/json' -d '
{
  "settings": {
        "index.number_of_shards" : 5,
        "index.number_of_routing_shards" : 10,
        "index.number_of_replicas": 1
    }
}
'


curl -XPUT -u lisai:xxxxxxx 'http://es.cloud.com:9200/test-2059.11.30?pretty&pretty' -H 'Content-Type: application/json' -d '
{
  "settings": {
        "index.number_of_shards" : 10,
        "index.number_of_replicas": 1
    }
}
'
移动分片
POST _cluster/reroute
{
 "commands" : [
{
"move" : {
"index" : "iflog-2018.11.20", "shard" : 2,
"from_node" : "es-11-58", "to_node" : "es-11-31"
}
}
]
}
注意事项
- 可在一台机器上运行多个节点来构建集群,只是性能会和机器配置相关
- 集群中节点选型策略。node-data节点(随着数据增加而增加),note-client(随着查询压力而增加)节点
- 集群节点数量上升时,多关注配置参数,如
gateway.recover_after_nodes等,会带来很多效率的提高 - 当集群数量较大时,建议横向扩展集群。单纯增加es节点的内存和CPU不会有很大提升,建议多增加节点
参考
其它文档